Starlink Router Settings: Browser Login, Bypass Mode & Wi-Fi Setup
On this page
Starlink routers do not have a traditional web browser admin login at 192.168.1.1 or 192.168.100.1. Unlike conventional home gateways with embedded web portals, all network management (Wi-Fi passwords, 2.4 GHz and 5 GHz band splitting, custom DNS, and Bypass Mode) is handled exclusively through the official Starlink Mobile App or the Starlink web portal. Visiting 192.168.100.1 in a browser accesses the satellite dish's local diagnostic interface rather than router configuration menus.
Whether you are fine-tuning a Gen 3 Wi-Fi 6 router, integrating third-party mesh systems like UniFi or Eero, or troubleshooting local IP routing, this guide breaks down every setting, hardware constraint, and configuration step. For hardware mounting and cabling groundwork, explore our comprehensive installation and setup guide.
Can You Access Starlink Router Settings in a Web Browser?
When you type 192.168.100.1 or http://dishy.starlink.com into your browser, you are communicating directly with the phased-array antenna on your roof or mounting pole, completely bypassing the router's software layer. This browser dashboard is strictly read-only for network telemetry and dish maintenance.
From this local dish interface, you can inspect real-time downlink and uplink throughput, ping latency, satellite obstruction heatmaps, GPS lock, and hardware uptime. You can also trigger the motorized stow command or initiate snow-melt heating. However, you cannot change your Wi-Fi name, update security keys, or manage DHCP pools from this page.
Starlink Router Hardware Generations Compared
Starlink hardware has evolved through three primary standalone router revisions alongside the integrated Starlink Mini. According to official Starlink hardware specifications, the Gen 3 router (Model UTR-231) introduces native RJ45 Gigabit Ethernet ports and tri-band Wi-Fi 6, resolving the cabling and adapter bottlenecks that affected the Gen 2 actuated kit. Check our Starlink cable length and extension guide for connector pinouts and voltage drop specifications.
| Hardware Model | Wi-Fi Standard & Radios | Ethernet Ports | Environmental Rating | Bypass Reset Method |
|---|---|---|---|---|
| Gen 3 Router (UTR-231) | Wi-Fi 6 (802.11ax) Tri-Band 4x4 MU-MIMO, up to 235 devices | 2x Latching RJ45 Gigabit LAN (Built-in) | IP56 Water-resistant (-30°C to +50°C) | Rear pinhole button (press with paperclip) |
| Gen 2 Router (UTR-211) | Wi-Fi 5 (802.11ac) Dual-Band 3x3 MIMO, up to 128 devices | None (Requires $25 SPX Ethernet Adapter) | IP54 Weather-resistant (-30°C to +50°C) | Power cycle AC plug 6 times consecutively |
| Starlink Mini (Integrated) | Wi-Fi 5 (802.11ac) Dual-Band 3x3 MIMO (Built into dish) | 1x Latching Waterproof RJ45 Gigabit LAN | IP67 Weatherproof (-30°C to +50°C) | Rear reset button (hold for 3 seconds) |
| Gen 1 Router (UTR-201) | Wi-Fi 5 (802.11ac) Dual-Band 3x3 MIMO | 1x Gigabit AUX Port (Built-in) | Indoor Rated (IP50) | Base pinhole reset button |
Essential Starlink Wi-Fi Settings & Network Optimization
Opening the Starlink App and navigating to Settings > Router reveals several configuration toggles that directly improve wireless performance and IoT device compatibility:
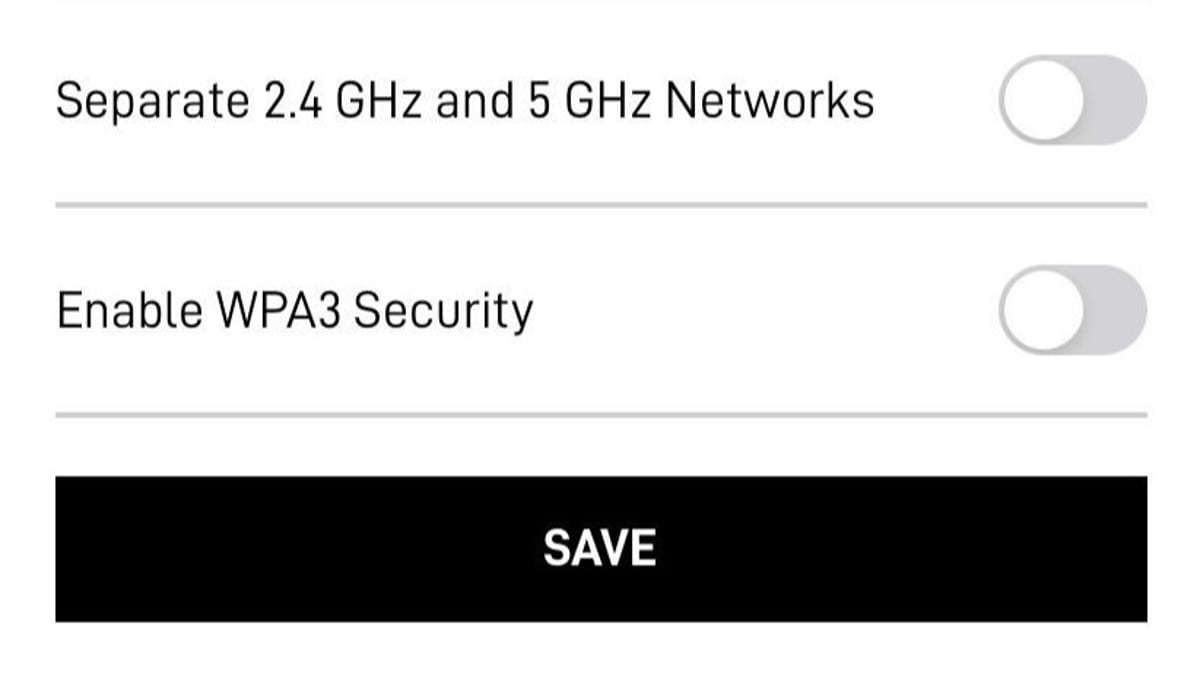
1. Split 2.4 GHz and 5 GHz Frequencies: By default, Starlink combines 2.4 GHz and 5 GHz into a single SSID using band steering. While convenient for modern smartphones, legacy smart home gear (smart plugs, security cameras, microcontrollers) often fails to negotiate combined SSIDs. Toggling 'Split 2.4 / 5 GHz Networks' in the app creates separate SSIDs, ensuring 2.4 GHz devices stay locked to long-range channels while PCs and consoles utilize faster 5 GHz channels.
2. Custom DNS Configuration: Under Advanced Network Settings, you can replace default ISP resolvers with high-performance Anycast DNS providers such as Cloudflare (1.1.1.1 and 1.0.0.1), Google DNS (8.8.8.8 and 8.8.4.4), or Quad9 (9.9.9.9) to reduce initial domain lookup latency.
3. Content Filtering & Parental Controls: Starlink provides automated DNS filtering at three preset tiers: Off, Malware Only (blocks known malicious phishing and command-and-control domains), and Malware + Adult Content (restricts adult entertainment and gambling sites at the gateway level).
4. Power Conservation Sleep Schedule: Located under Settings > Starlink > Sleep Schedule, this timer puts both the router Wi-Fi and phased-array beam tracking into a low-power hibernation state during night hours. For off-grid cabin and RV battery banks, this prevents unnecessary 40 to 75 watt continuous draw. See our Starlink power consumption and solar sizing guide for exact amp-hour budget calculations.
How to Enable Bypass Mode for Third-Party Mesh Routers
If you manage a large property or require advanced firewall controls, bridging to third-party hardware like a UniFi Dream Machine, Eero mesh network, or ASUS router eliminates double-NAT routing conflicts. As outlined in the official Starlink Bypass Mode guide, enabling Bypass Mode completely shuts off internal Wi-Fi radios and DHCP servers. If you prefer expanding wireless coverage without replacing the primary gateway, review our Starlink Wi-Fi range and repeater guide.
Follow these steps to activate Bypass Mode:
1. Physical Connection: Connect a Cat6 ethernet patch cable from the Starlink LAN port (Port 1 on Gen 3, or the Ethernet Adapter on Gen 2) directly into the WAN/Internet port of your third-party router.
2. Open Settings: In the Starlink App, navigate to Settings > Router > Bypass Mode.
3. Slide to Enable: Slide the toggle to 'Enable' and confirm the prompt. On the Gen 3 router, the front LED will change to solid violet to confirm active bridge status.
How to Access Dish Diagnostics in Bypass Mode (Static Route)
Once Bypass Mode is active, opening the Starlink App or navigating to 192.168.100.1 from a computer connected to your third-party network may return a connection timeout error. This occurs because your third-party router treats 192.168.100.1 as an unroutable private IP and drops the packet at its local firewall.
To restore live dish telemetry and obstruction maps, log into your third-party router's management dashboard (e.g., UniFi Network Controller, ASUSWRT, or pfSense) and create a static route with the following parameters:
• Destination Network / IP: 192.168.100.1 (or 192.168.100.0)
• Subnet Mask: 255.255.255.255 (or /32 single host)
• Gateway / Interface: WAN (select the physical WAN port connected to Dishy)
How to Exit Bypass Mode & Factory Reset
Because enabling Bypass Mode disables the Starlink router's internal Wi-Fi radios and management server, you cannot simply reopen the app to toggle it off. Exiting Bypass Mode requires initiating a hardware factory reset, which restores the default 'STARLINK' Wi-Fi network.
• Gen 3 Router (UTR-231): Remove the rubber LAN cover on the back of the router. Insert a straightened paperclip into the pinhole reset button until the front LED begins flashing rapidly, then release.
• Gen 2 Actuated Router (UTR-211): Power cycle the router by unplugging the AC power cord and plugging it back in 6 consecutive times with 2-second intervals.
• Starlink Mini: Press and hold the physical reset button on the rear I/O panel for 3 seconds until the status indicator cycles off.
Frequently Asked Questions
What is the default IP address for the Starlink router?
The Starlink router assigns local LAN devices IP addresses in the 192.168.1.0/24 subnet (gateway 192.168.1.1). However, typing 192.168.1.1 into a web browser does not load a router login portal. To manage settings, use the Starlink App. To view dish diagnostic telemetry, browse to 192.168.100.1.
Can I connect my own mesh router without enabling Bypass Mode?
Yes, but doing so creates a double-NAT network environment where both the Starlink router and your third-party router perform network address translation. While basic web browsing functions normally, double-NAT introduces latency jitter for competitive online gaming, VoIP calls, and VPN handshakes. Enabling Bypass Mode or setting your mesh nodes into Access Point (AP) mode is strongly recommended.
Why does Starlink not allow inbound IPv4 port forwarding?
Starlink allocates Carrier-Grade NAT (CGNAT) addresses from the 100.64.0.0/10 block for Standard and Mobile service plans. Because your dish shares an external public IPv4 address with multiple subscribers at the ground teleport, incoming traffic cannot be routed to a specific customer router. You can bypass this using IPv6 prefixes, Cloudflare Tunnels, or priority service tiers with public IP assignments.
How do I change Starlink router settings when away from home?
Log into the Starlink App on your smartphone using your Starlink account credentials. As long as your dish is powered on and connected to the constellation, the app establishes a secure cloud relay to your home router, allowing you to reboot hardware, toggle sleep schedules, or manage connected devices remotely over cellular data.